
Ingredients
(makes 4 pint jars)
1 large watermelon (about 12 lbs, yielding ~16 cups cubed rind)
1 cup pickling or canning salt
6 cups granulated sugar
4 cups white vinegar (5% acidity)
1 lemon, thinly sliced
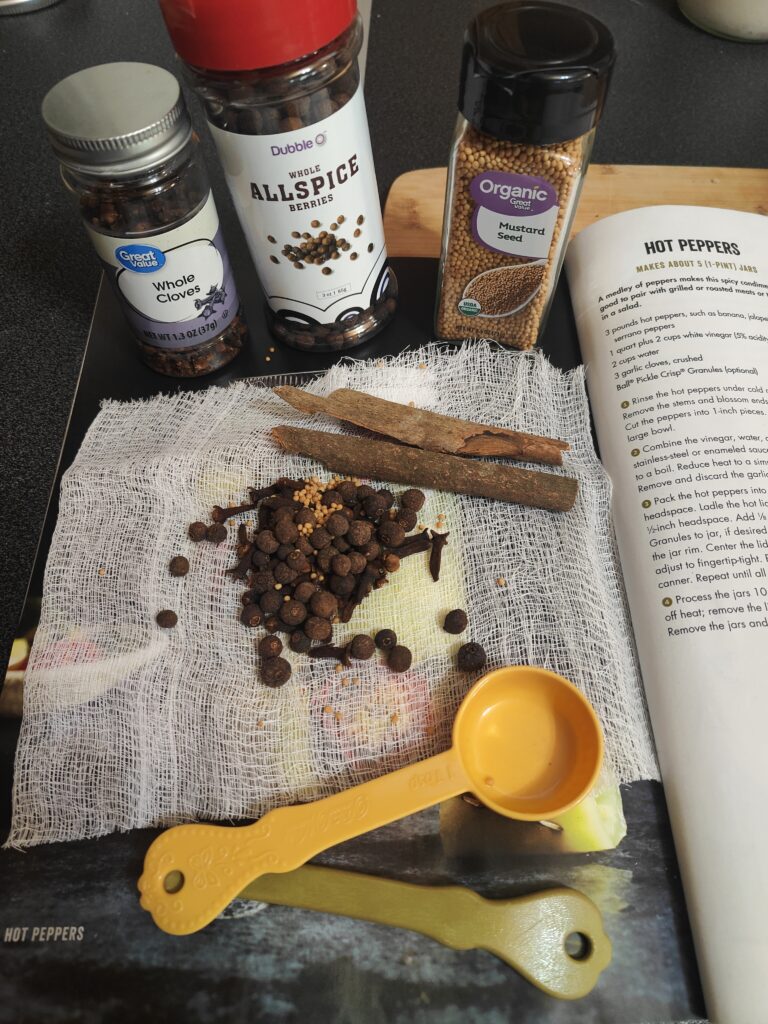
Spice Bag:
3 cinnamon sticks, broken in half
1 tbsp whole cloves
1 tbsp whole allspice berries
First of All, Watermelon Rind Pickles?
Flipping through the Ball Canning 101 book, my wife stumbled across a recipe for Watermelon Rind Pickles, and I found myself wondering, “Why?” She countered with, “Why not?” Fair enough! We grabbed a watermelon and took a shot at it, diving into uncharted territory. I’d never even heard of pickled watermelon rind before, but I love recipes that tweak waste into something golden. Call me crazy, but this recipe’s a gem for homesteaders. It uses a byproduct we already have, cuts trash costs, and—get this—can turn a profit at the farm store, farmers market, or cottage bakery. Google the price of pickled watermelon rind; you’ll see the money-making potential! Here’s our straightforward take, perfect for beginners. New to water bath canning? Check our Canning 101 guide for the basics.
Why Watermelon Rind Pickles?
This recipe’s a win for any homesteader, and here’s why we’re hooked:
- Zero Waste: We’re already eating watermelon—why compost or trash the rind? Turn a byproduct into a tangy treat.
- Saves Money: Before this, rinds went to the trash, and trash bags aren’t free. Less waste, lower costs.
- Profit Potential: A quick search shows pickled watermelon rind selling for up to $20 in stores (Google it). Stock your farm store or cottage bakery and cash in!
- Monopoly: No one else is doing it. Which will make you the only person, at least for a bit.
It’s a clever way to stretch your harvest, and the flavor—sweet, sour, and spiced—surprised us in the best way.
Step-by-Step Instructions
Here’s the exact process we followed, tailored for beginners using water bath canning:
1. Preparing the Watermelon
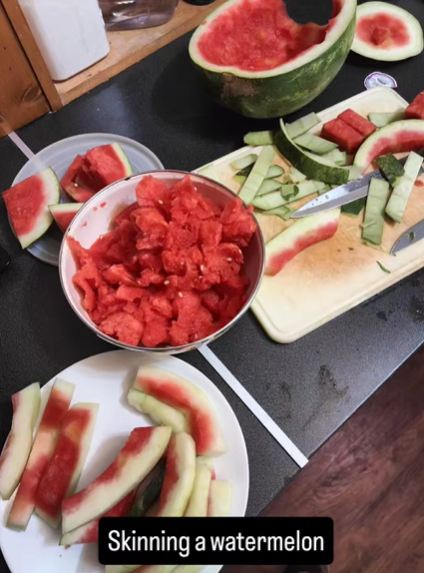
- Rinse and dry watermelon under cold running water, then pat dry with a clean towel.
- Cut into quarters for easy handling.
- Cut each quarter into 1-inch strips.
- Remove the flesh (if you didn’t eat it already!), saving it for snacking.
- Remove the green peel/skin with a sharp knife—discard or compost it.
- Cut the rind into 1-inch cubes.
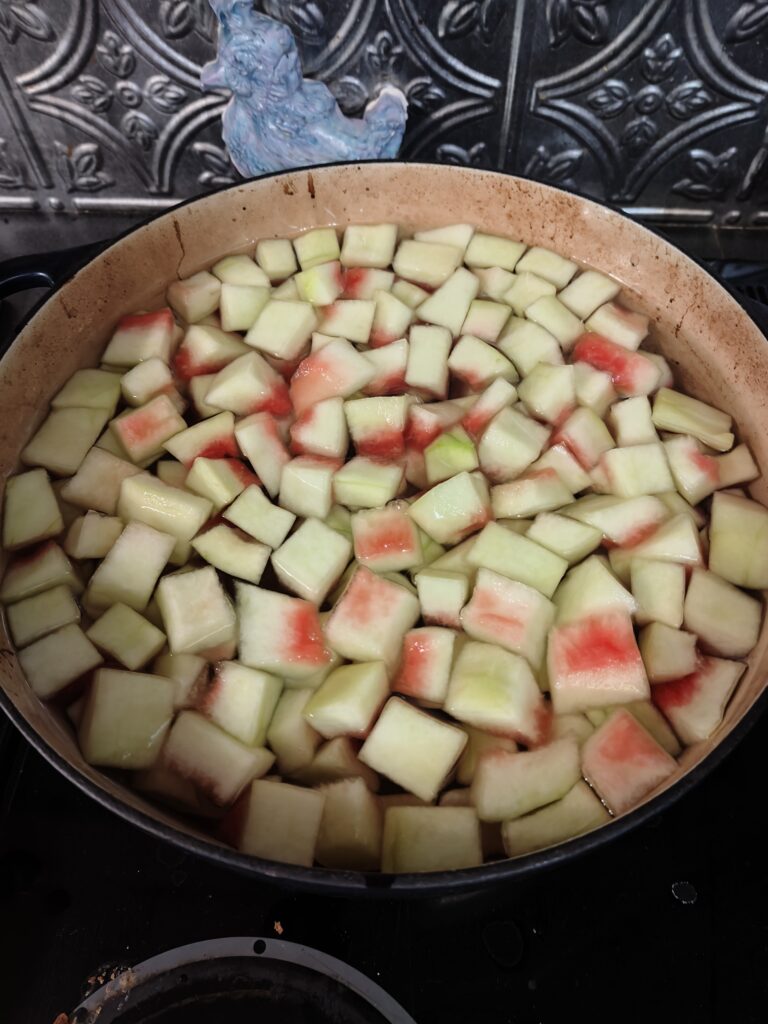
2. Preparing the Brine
- Put 4 quarts of water into a stock pot and stir in 1 cup pickling salt until dissolved.
- Add cubed watermelon rind and let sit 12 hours or overnight to soften and draw out moisture.
3. Cooking the Watermelon Rind
- Rinse the rind with cold water in a colander to remove salt.
- Add to a saucepan with 4 quarts of water.
- Cook over medium heat until watermelon rind is tender, about 10-15 minutes.
- Drain and set aside.
4. Creating Pickling Liquid
- Combine spice bag (with cinnamon sticks, cloves, and allspice), 6 cups sugar, lemon slices, and 4 cups white vinegar in a saucepan.
- Bring mixture to a boil, stirring until sugar dissolves.
- Reduce to a simmer for 10 minutes to meld flavors.
5. Getting Pickles
- Add the watermelon rind to the pickling juice, simmer until transparent (about 10-15 minutes).
- Remove spice bag from the saucepan.
6. Canning the Pickles
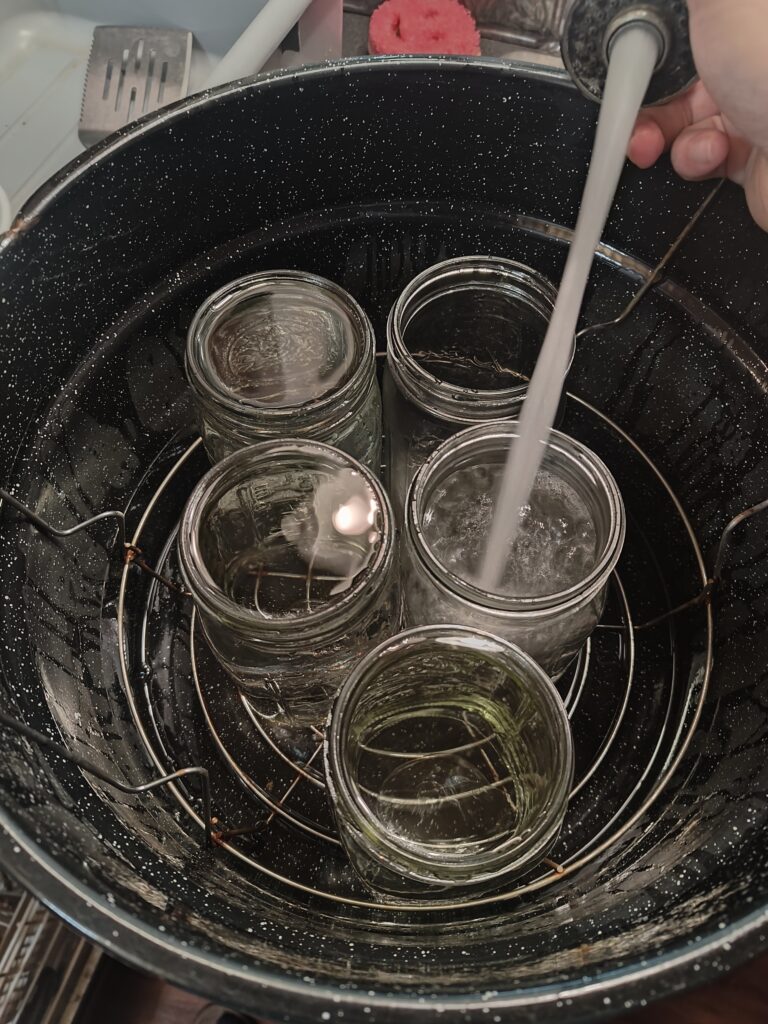
- Sterilize pint jars by boiling for 10 minutes (add 1 minute per 1,000 feet above sea level for Texas altitudes).
- Keep lids warm in hot (not boiling) water.
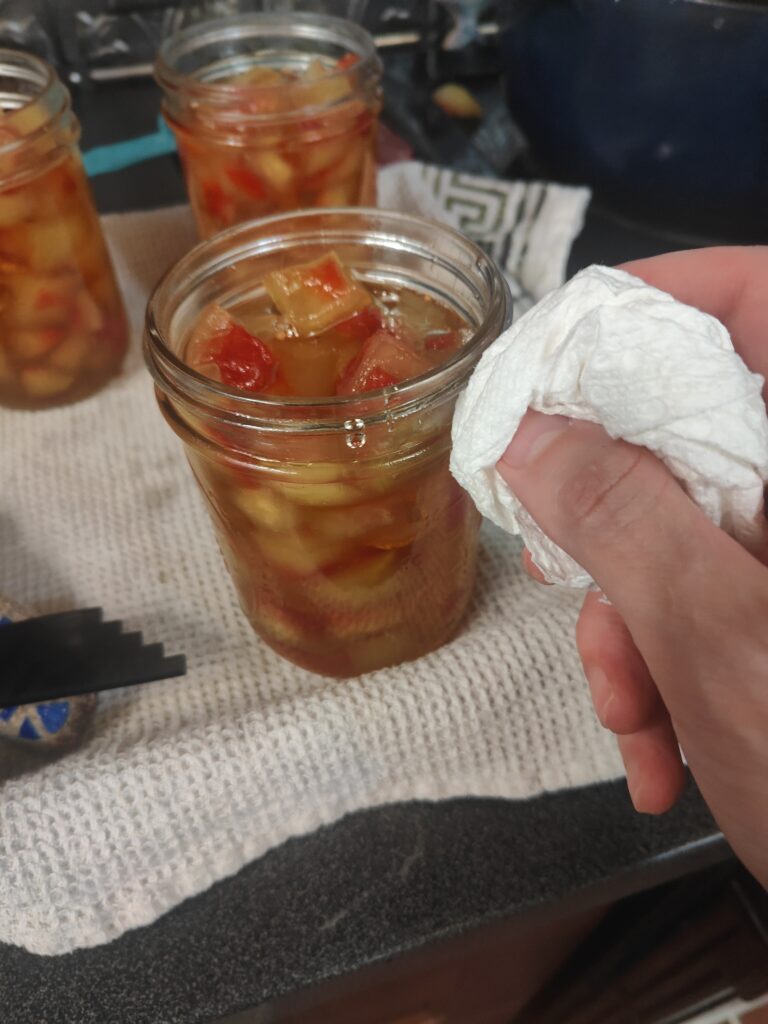
- Pack watermelon rind into hot jars, leaving ½-inch headspace.
- Ladle pickling liquid over watermelon rind, maintaining ½-inch headspace.
- Remove air bubbles with a non-metal tool, wipe rim clean, and add lid with finger-tight ring.
- Place jars into boiling water canner as you fill them, ensuring all are ready.
7. Processing the Jars
- Lower jars into canner, ensuring they’re covered by 1-2 inches of water.
- Process in boiling water for 10 minutes (adjust for altitude).
- Turn off heat, remove lid from water bath, and let sit 5 minutes.
- Remove jars with jar lifter and cool on a towel for 12-24 hours.
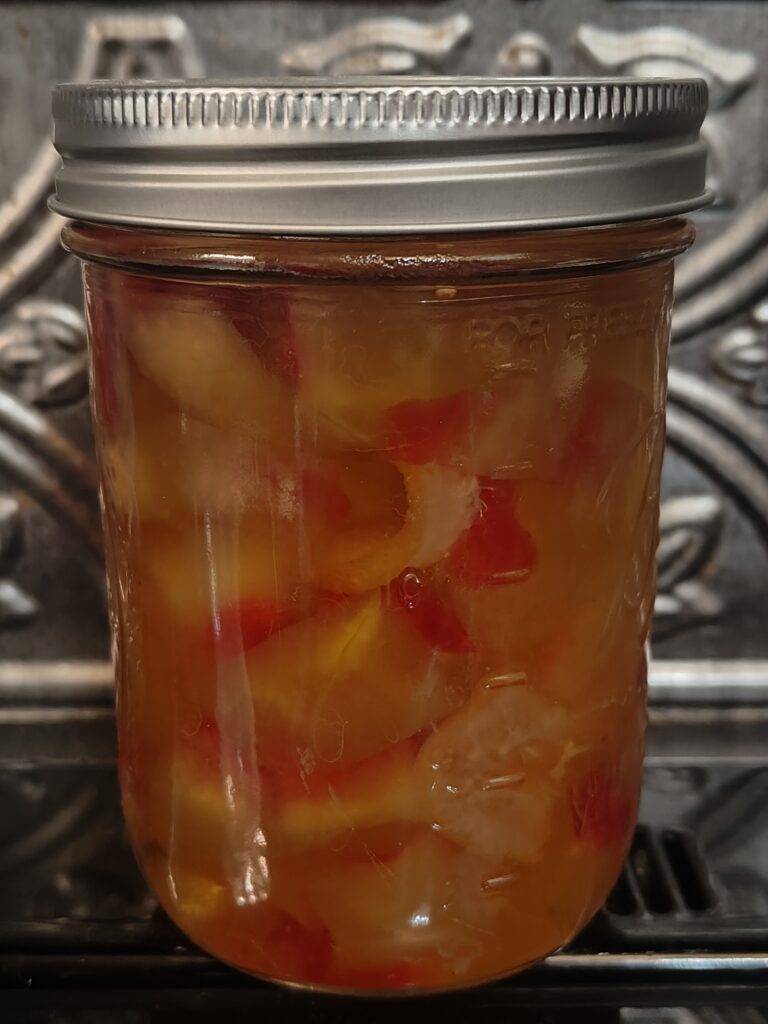
- Press lids to check seals—no flex means success!
- Label with date and store in a cool, dark place (up to 1 year). Unsealed? Refrigerate and use within 2-3 weeks.
Our Experience
We were skeptical—pickled rind sounded odd! But the sweet-tangy flavor, spiced with cinnamon, cloves, and a hint of lemon, won us over. The texture’s firm yet tender, perfect as a side to BBQ or a standout at our Farmers Market stall. We made 5 pint jars, and one’s already gone! The process was simple, even for a rind newbie like me.
Tips for Success
- Use Fresh Rind: Pick a firm, ripe watermelon for best texture.
- Safety First: Stick to this tested recipe for safe pH (inspired by Ball). See USDA guidelines for details.
- Market Ready: Label jars “Texas Pickled Watermelon Rind” for a local twist—sells for $6-$10 at markets!
- Tweak It: Try strips instead of cubes next time, or add ginger for a custom kick—test small batches.
Conclusion
Pickled watermelon rind turned our “why” into “wow”! This recipe transforms waste into gold—saving trash costs, using what we’ve got, and opening doors for farm store or Farmers Market sales. It’s a straightforward water bath canning project, perfect for beginners or pros. Pair it with your photos, try a jar with grilled chicken, and share your results with #HomesteadMonster. New to canning? Our Canning 101 guide has you covered. Let’s make the most of every harvest!
Resources:
Leave a Reply