
When I started canning, it wasn’t just about savoring summer’s ripe tomatoes in the dead of winter—though that’s a delicious perk! My goal was to boost food storage for my family and offer something new at our Farmers Market stall. Customers often asked, “What else do you have?” and I knew it was time to expand beyond fresh produce. I needed canning 101. Canning opened up a world of possibilities, from jams to pickles, that kept our pantry stocked and our market table buzzing.
In Texas, the Cottage Food Law makes it easy to can for both home use and sale, with some straightforward regulations to follow. Whether you’re growing your own produce or snagging peak-season deals at the store, canning saves money, preserves flavor, and lets you enjoy ripe foods all year. Plus, there’s nothing quite like the satisfying pop of a jar lid sealing your hard work. This guide will walk you through water bath canning, share mistakes we made as beginners, and offer our favorite recipe to get you started.
Why Start Canning?
Canning is a cornerstone of homesteading, and in 2025, it’s more popular than ever. Social media platforms like TikTok (#canning) and X show millions of people sharing their canning journeys, from urban apartments to rural farms. For beginners, canning is a practical way to:
- Save Money: Preserve bulk produce when prices are low.
- Reduce Waste: Use up garden surplus or market leftovers.
- Boost Self-Sufficiency: Stock your pantry with chemical-free, home-preserved foods.
- Expand Market Offerings: Sell jams, jellies, or pickles under Texas Cottage Food Law.
It’s beginner-friendly—no sprawling homestead required. A small kitchen and a few tools are all you need to start. Plus, it’s a rewarding skill that connects you to generations of food preservers.
Texas Cottage Food Law: Canning for Sale
If you’re in Texas and want to sell your canned goods at Farmers Markets, the Texas Cottage Food Law (updated as of 2025) has you covered. Here’s the basics:
- Allowed Products: High-acid foods like jams, jellies, pickles, and fruit butters are permitted for sale, as they’re safely processed via water bath canning.
- Regulations: You can sell directly to consumers (e.g., at markets or from home) without a permit, but you must label products with your name, address, and a statement like “Made in a home kitchen, not inspected by state health authorities.”
- Limits: Annual gross income from cottage food sales is capped at $50,000 (check for updates). You can’t sell online or ship across state lines.
- Safety: Follow tested recipes (e.g., from USDA or Ball) to ensure safe pH levels.
Tip: For detailed guidelines, visit the Texas Department of State Health Services.
Essential Tools and Supplies
You don’t need a fancy setup to start canning. Here’s what we use:
- Water Bath Canner: A large pot with a rack for processing high-acid foods (about $20-$40).
- Mason Jars: Ball or Kerr jars (pint or quart sizes, around $1 each). Reuse jars but always use new lids for a safe seal.
- Lids and Bands: Lids are single-use; bands can be reused if rust-free.
- Jar Lifter: Safely handles hot jars ($5-$10).
- Funnel and Bubble Remover: For clean filling and removing air bubbles ($3-$5).
- Basic Kitchen Tools: Pot, ladle, and clean towels.
Safety Note: Always use new lids to prevent seal failures, which can lead to spoilage.
Water Bath Canning: Step-by-Step for Beginners
Water bath canning is perfect for beginners because it’s simple and works for high-acid foods like fruits, jams, jellies, and pickles. Here’s how we do it:
- Prep Your Jars: Wash jars, lids, and bands in hot, soapy water. Sterilize jars by boiling them for 10 minutes (add 1 minute per 1,000 feet above sea level).
- Prepare Your Recipe: Use a tested recipe (e.g., from USDA or Ball) to ensure safe acidity. We’ll share our favorite below!
- Fill Jars: Use a funnel to fill jars, leaving ½-inch headspace (space between food and jar rim). Remove air bubbles with a non-metal tool.
- Seal Jars: Wipe jar rims clean, place lids, and screw on bands until “fingertip tight” (snug but not forced).
- Process: Place jars in the canner, ensuring they’re covered by 1-2 inches of water. Boil for the recipe’s specified time (e.g., 10 minutes for jam).
- Cool and Check: Remove jars with a lifter, cool for 12-24 hours, and check seals (lids should not flex when pressed).
Beginner Tip: Start with a small batch (4-6 jars) to build confidence. Jams are forgiving and fun!
Mistakes We Made (So You Don’t Have To)
As beginners, we learned the hard way, but you have Canning 101. Here are pitfalls to avoid:
- Not Removing All Foam: It’s not easy at first, but if you don’t do a good job skimming, that foam hardens and looks bad in the sealed jar.
- Forgetting to Tighten a lid: You’ll be shocked when you look into the water bath and see your pickled asparagus floating around – better remember that lid.
- Not Checking Seals: One jar didn’t seal properly and spoiled. Press lids after cooling; if they pop, refrigerate and use soon.
Pro Tip: Keep a notebook to track recipes and processing times—it’s a lifesaver for market prep.
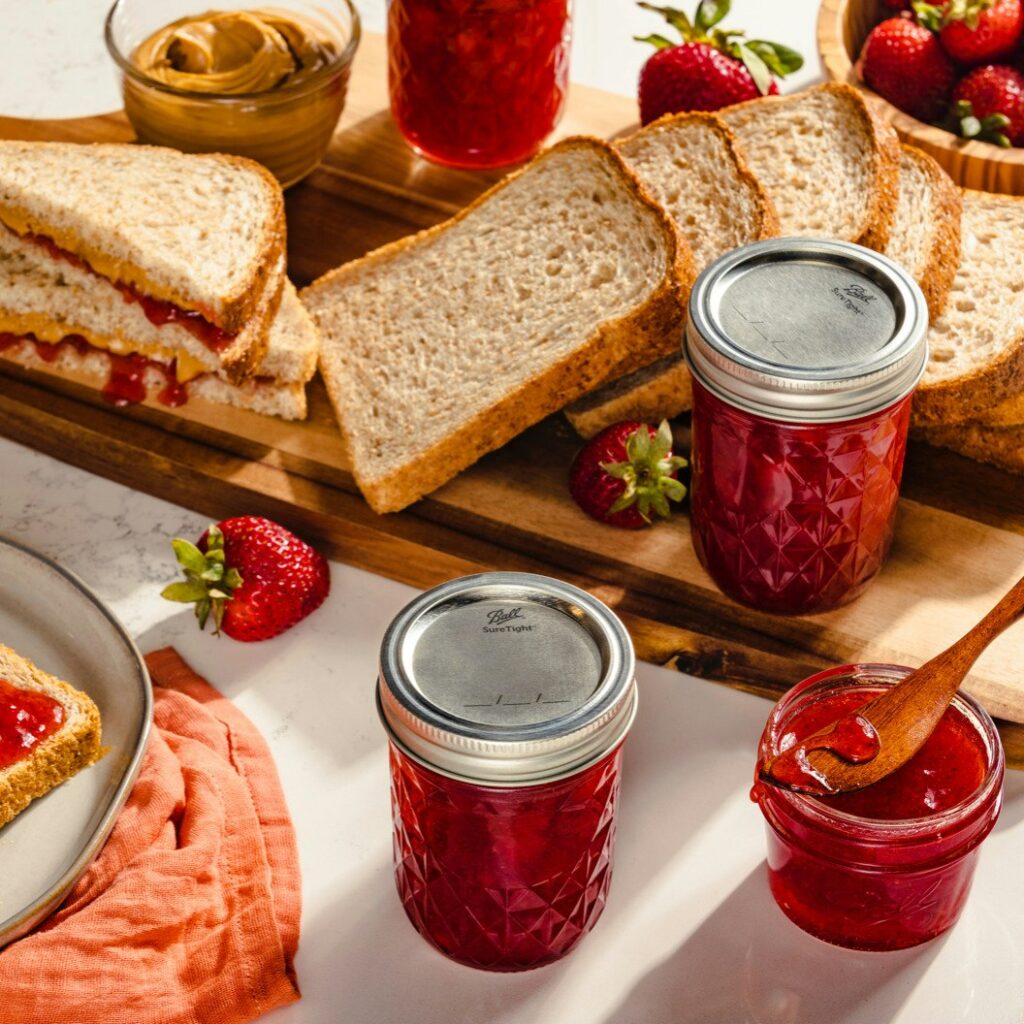
Our Favorite Recipe: Classic Strawberry Jam
This is our go-to recipe for Farmers Market customers and home enjoyment. It’s simple, delicious, and perfect for beginners.
Classic Strawberry Jam
Ingredients
-5 cups crushed strawberries (about 2-3 lbs fresh)
-7 cups granulated sugar
-1 package (1.75 oz) powdered pectin
-¼ cup lemon juice (fresh or bottled for consistent acidity)
Image and Recipe from Ball Canning Recipes
Steps:
- FIRST, LET’S PREP!
Prepare boiling water canner. Heat jars in simmering water until ready for use. Do not boil. Wash lids in warm soapy water and set bands aside. - NEXT, TIME TO COOK!
Combine strawberries and lemon juice in a 6- or 8-quart saucepan. Gradually stir in pectin. Bring mixture to a full rolling boil that cannot be stirred down, over high heat, stirring constantly. - Add entire measure of sugar, stirring to dissolve. Return mixture to a full rolling boil. Boil hard 1 minute, stirring constantly. Remove from heat. Skim foam if necessary.
- Ladle hot jam into a hot jar leaving a ¼ inch headspace. Remove air bubbles. Wipe jar rim. Center lid on jar and apply band, adjust to fingertip tight. Place jar in boiling water canner. Repeat until all jars are filled.
- Process jars 10 minutes, adjusting for altitude. Turn off heat, remove lid, let jars stand 5 minutes. Remove jars and cool 12-24 hours. Check lids for seal, they should not flex when center is pressed.
Why We Love It: It’s sweet, vibrant, and sells out at markets. Store sealed jars in a cool, dark place for up to a year.
Conclusion
Canning is more than a skill—it’s a way to preserve the season, save money, and share your harvest with family or customers. Whether you’re stocking your pantry or prepping for the Farmers Market, water bath canning is an accessible starting point. Avoid our beginner mistakes, follow tested recipes, and enjoy the pop of a perfectly sealed jar. Ready to try it? Share your first canning adventure with #Canning101, and check out our other homesteading tips to grow your skills!
Check out this Watermelon Rind Pickle recipe here.
Resources:
Leave a Reply